Workflows
Semester 2, 2022
Associated Material
Zoom Notes: Zoom Notes 09 - Workflows
Introduction
In this module we’re going to cover some ways to improve your workflow as you use R. As you develop your understanding of R and proceed to do fancier things, you’ll want to start bringing in extra features to make your life easier. When we think of a workflow there are three main phases we undertake. At the very beginning we’re setting ourselves up, establishing how things will be organised, and how we intend to work. Second, we do the work - which involves testing and adjusting the established systems, and lastly, we wrap things up.
Getting organised
In the first module we discussed creating a structure for your work inside an RStudio project. For both analysis and programming projects it is useful to have a pre-established ‘go-to’ template structure to keep things organised.
An overarching principle is “keep similar things together”. For an analysis project, this can mean the structure we first covered when setting up an RStudio Project:
My_Project/
  |- data/
  |- docs/
  |- output/
  \- scripts/
Beyond the structure of where we put things, we also want to establish the the principles of how the project will operate. Two important files in this regard are the README and the LICENSE. The README will tell yourself and others important details about the project such as where the source data came from, or how to run the code in the project (e.g. order of scripts). Secondly a LICENSE - this will become important later on when code you have written may be released for others to see (e.g. as part of a research paper) as it will set out the rules under which people may use your code.
Licensing
When we’re dealing with research, by and large we’re operating in an “open source” manner - i.e. the code that is used to perform the research is shared alongside the results so that people can view it. Just because the code is available doesn’t mean that people get to do what they like with your code though.
It’s always a good practice to add a license to go along with your code. A license is a document that lets people who come across the code what they’re allowed to do with it, and what they’re not. There are many open source licenses available and they vary in what behaviours they permit or restrict. When choosing an open source licence there are 3 main questions you need to answer:
- Do you care about how any modifications that people make to the code are distributed?
- Do you or your institution own any related software patents?
- Do you care about the way your name is or isn’t mentioned when someone makes use of your code?
An extremely common license in research code/software is the MIT license which is the simplest and most permissive, and essentially says the code is “as is” without any warranties, and lets people use, copy, modify, and distribute your code so long as the copyright notice goes along with it (i.e. for attribution purposes). For help selecting an appropriate license have a look at https://choosealicense.com.
The usethis Package
The usethis
package is designed to assist in the creation of new packages and
setting up of new projects. It is is an extremely useful package for
several “workflow” tasks. It provides functions for many common workflow
tasks such as creating new projects, adding README files, or opening R
files.
# Create and open a new package
usethis::create_project(path = "path/to/new/project")

# Create a markdown README
usethis::use_readme_md()

# Create an RMarkdown README
usethis::use_readme_rmd()

# Create a new R script in your project in directory R/
usethis::use_r(name = "myfile.R")
On top of these, there are many other helper functions, such as for creating various licenses, editing configurations, interacting with version control software, or setting up automatic testing. All of which we’ll touch on in this module.
Once you have chosen an appropriate license, usethis
likely has a template ready to go.
e.g. usethis::use_mit_license().
Configuration
As part of the set up stage, we’re also wanting to make things easier on ourselves to that we can be more productive during the “do stuff” stage.
There is a hidden file called .Rprofile which is loaded as R launches
and is a place where you can place customisations of options to make
your R life easier. For instance I have mine set to automatically load
workflow helper packages such as usethis
testthat and devtools. And set a few options
to make R produce more warnings so that it helps me know when something
might cause an issue. It’s also a good place to set some defaults such
as your favourite CRAN mirror so that R doesn’t need to ask you when you
go to install packages.
usethis::edit_r_profile() # load workflow helper packages if in interactive session
if (interactive()) {
suppressMessages(require(devtools))
suppressMessages(require(usethis))
suppressMessages(require(testthat))
}
# set CRAN
options(repos = c(CRAN = "https://cloud.r-project.org/"))
# warn on partial matches
options(
warnPartialMatchArgs = TRUE,
warnPartialMatchDollar = TRUE,
warnPartialMatchAttr = TRUE
)
# fancy quotes are annoying and lead to
# 'copy + paste' bugs / frustrations
options(useFancyQuotes = FALSE)Don’t put analysis modifying options into your .Rprofile
e.g. automatic loading of tidyverse. It will make the code
you write less reproducible because it will start depending on these
hidden settings, and it can make debugging harder.
Keyboard shortcuts
The keyboard shortcut to rule them all: Alt + Shift + K
Other useful shortcuts
| Keys | produces |
|---|---|
| Ctrl + Shift + M | %>% |
| Alt + - | <- |
| Ctrl + Shift + K | knits Rmd |
| Ctrl + Shift + F10 | Restart R |
| Ctrl + Alt + I | Insert code chunk |
| Ctrl + Shift + S | Source active file |
| Ctrl + . | Go to file/function |
Make your own…
Tools -> Modify Keyboard Shortcuts
Scripts
Establish the structure of how you want to capture your code. Are you
going to do everything in Rscripts? RMarkdown? A combination? Create the
appropriate script files. It can be useful to have a separate Rscript
where you store functions that you create which can be ‘sourced’ into
your other scripts through source("scriptname.R).
Initialise Version Control
This section is a very brief overview of version control, specifically to say that you should start to build it into your workflow and we’ll touch on it again in the Automating Version Control section but ultimately the details are outside of the scope of this course.
You are likely familiar with versioning, usually people try to
achieve this through file names. This is ok to a point but can
cumbersome and doesn’t scale well across multiple files nor does it give
you an easy way to see exactly what the differences were between those
files. This is where using version control software such as
git can make your life easier.
It’s always a good idea to get this set up before you get under way
doing actual work so that you can track you changes from the the very
start. In the case of git, following Happy Git with R for installing and
configuring git and subsequently telling RStudio about your
installation is a good place to start.
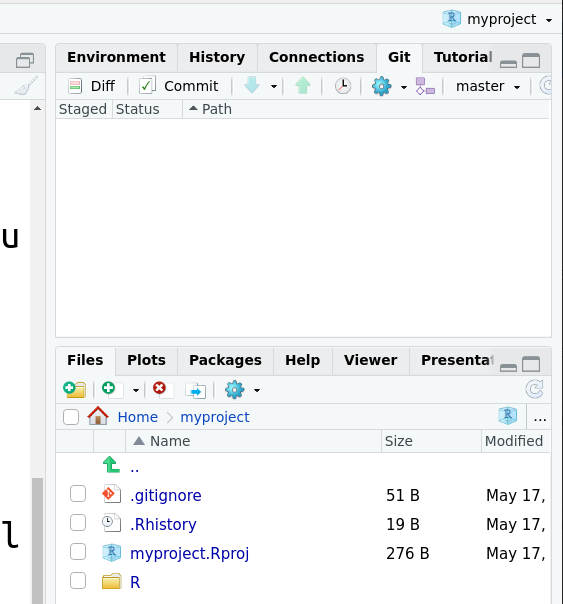
Once you have RStudio set up with git, when you add
(initialise) version control onto your project you’ll get an new tab
appear and a hidden directory called .git will be created
inside your project directory. A directory under version control is
called a ‘repository’ or ‘repo’.

Version control is used for keeping track of the changes made to your scripts, we don’t usually use it to manage our data - since our initial raw data isn’t going to be changing. For managing data, we use an appropriate backup or archiving system.
Testing and Adjusting
Once things are set up, we’re ready to actually start doing the work we want to do. As we develop our code however, we constantly cycle through testing and adjusting. Each piece of code we write needs to be checked that is is working correctly. Often this type of testing is performed manually as you go: ‘does the line of code run?’ - checking for syntax errors, and then ‘does the output look right?’. When the answer to these either question is no, we then enter a debugging mode where we try and find out why the code isn’t doing what we think it should be.
Debugging
Errors messages are common when coding and are a way the computer communicates it doesn’t understand what the instructions it has been given are. Common types of errors we encounter are:
- syntactical
- logical
- runtime
Syntactical errors are usually the most straight forward, the computer says that no straight away due to improper syntax. These are usually the easiest to find and correct. Logical errors come about through incorrect implementation of logic. The computer will run the code without complaint but the result isn’t correct - these can be tricky to find and fix because they often involve checking each logical statement and subsequent code pathway in order to track down what is going wrong. Runtime errors are errors where you are trying to make the computer do something it can’t in certain situations, such as storing a result in a certain location. The code will run sometimes but not others and again can be tricky to track down.
Remember, each time we find and fix an error, we must retest. This can get quite laborious to do manually so we can find better systems to help such as automatic testing but first we’ll cover some general principles on how to go about debugging.
Where do I start?
Knowing where to start debugging takes practice. some general good advice can be found in https://adv-r.hadley.nz/debugging.html with some specific tips and tricks for R. The general premise is that we want to test and confirm all of our assumptions.
Finding your bug is a process of confirming the many things that you believe are true — until you find one which is not true.
— Norm Matloff
Some techniques for solving errors and confirming our assumptions can include:
- using print statements to confirm values at key stages
- googling the error message
- restart R and rerun the code
- reading the documentation
- talk through the problem

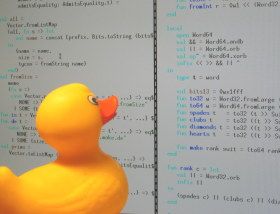
‘Rubber duck debugging’ is a technique which involves talking your way through what you are trying to achieve with your code and explaining what your code is actually doing at each step to a rubber duck (or other toy). Often by being systematic and saying out loud what is happening this will trigger an “a-ha” moment as to what is causing the issue. You can also use this technique with another person e.g. co-worker instead of a toy if you prefer.
General process
My general process focuses on the initial source of the error and then starts to work backwards in command history.
- Do I recognise the message?
- Re-look at the command I ran looking for
- typos
- missing syntax (e.g. brackets, semicolons, etc.)
- correct naming of things
- Is the input for my command what I expect it is?
- Did the previous command run properly?
- if not jump to 1. for the previous command
Getting to know some errors
R is notorious for having messages that are not user friendly. Lets look at a few common R errors and warnings so that we can become more familiar with a) what they look like, b) how to find the useful bits
Anatomy of a message
- Usually the first word is “Error”, but sometimes it can be “Warning”. Code that produces errors won’t run. Code that produces warnings will run but is signifying that you should be extra careful about the output because it might not be doing what you think it is.
- Immediately following is the exact code that is producing the error/warning. This tells you where to start looking.
- after the
:gives the details about what the error/warning actually is.
my_var
#> Error in eval(expr, envir, enclos): object 'my_var' not found
Caused by trying to access a variable that hasn’t been defined yet.
mean[2]
#> Error in mean[2]: object of type 'closure' is not subsettable
Caused by using the subsetting brackets [] instead of
() which are used for a function.
a <- c(one = 1,two = 2, three = 3)
a$one
#> Error in a$one: $ operator is invalid for atomic vectors
You can’t use $ on an atomic vector, it’s used on
structures such as data.frames or lists.
a[[20]]
#> Error in a[[20]]: subscript out of bounds
Caused by trying to access an element at an index that doesn’t exist.
read.csv("myfile.csv")
#> Warning in file(file, "rt"): cannot open file 'myfile.csv': No such file or
#> directory
#> Error in file(file, "rt"): cannot open the connection
Caused by providing a file name that R cannot find in the working directory.
ggplot()
#> Error in ggplot(): could not find function "ggplot"
Caused by not having a ggplot function either user
defined in the environment or not loaded a library that contains it
(ggplot2 or tidyverse).
notapackage::notafunction()
#> Error in loadNamespace(x): there is no package called 'notapackage'
Caused by trying to call a function from a package that doesn’t exist is not be installed on the library path.
if(NA){
  print("was NA")
}
#> Error in if (NA) {: missing value where TRUE/FALSE needed
if requires the result to be TRUE or FALSE,
NA isn’t a TRUE or FALSE.
if(c(3 > c(1,2,3))){
  print("less than three")
}
#> Error in if (c(3 > c(1, 2, 3))) {: the condition has length > 1

if(c(1,2,3) > 3){
  print("less than one")
}
#> Error in if (c(1, 2, 3) > 3) {: the condition has length > 1
if requires a single TRUE or FALSE result, these
statements create multiple. In older versions of R this produced a
warning and not an error.
mean(c("1", "2"))
#> Warning in mean.default(c("1", "2")): argument is not numeric or logical:
#> returning NA
Caused by the a data type that doesn’t coerce into a numeric automatically.
Adjusting
In the process of developing, it’s also important to take opportunities to adjust how things are being done. Working code is better than no code, but you create more code it’s also a good idea to every so often look for opportunities to make things better - efficiency or maintenance wise.
Code replication is a good place to start - if you’ve found yourself copy and pasting the same code over in the same project, consider making it into a function. This then gives you a single place that needs to be changed. If you find yourself copy and pasting your functions across projects, consider creating your own package.
RMarkdown driven dev
Emily Riederer has a great blog post about RMarkdown driven development which describes a process of development using RMarkdown documents, where first you get things to a working situation, then go through rounds of tidying your document bringing like-to-like with your code so that code blocks contain similar processes. As the tidying is performed, it provides an opportunity to also reduce duplication of code and increase the maintainability by converting processes into functions.
Packages
If you find yourself copy and pasting function between documents, it might be time to start creating your own package, that way you reduce the number of individual places your function is defined and this makes it easier in the future to maintain. Packages also bring in an extra level of utility in that you can improve documentation and implement automated testing so that you know when changes break functionality.
If you want to look further into how to create packages, check out
the R Packages online book
and you can use usethis::create_package() to create a new
package from a template.
Automating
As you go about developing, there are two main things you will find yourself doing over and over again - trying to remember what you have changed, and making sure that any changes haven’t broken anything. These processes can be quite time intensive so it’s quite useful to try and automate the pieces that you can.
Automated testing
As you code and manually test, it can be beneficial to formalise the manual tests into an automated solution so that you can be more efficient and also ensure that you know when you ‘break things’ with future changes. This is particularly useful when you fix bugs in your code, create a test that replicates the condition that caused the bug.
In R, one system uses the package testthat which
provides a framework to create these formal tests which will evaluate a
piece of code against the known expected output and tell you if they
don’t match.
# expect a mean of 2
testthat::expect_equal(mean(c(1,2,3)), 2)
testthat operates by setting up expectations and testing
if they hold true. If they are true the expectation function is silent,
if thy aren’t it will tell you when run. This lets you formalise tests
that you would be running manually and as you make adjustments to your
code you can rerun these tests to check things are still working.
Automating differences
Version control software is slightly different from what you might have experienced with something like ‘track changes’ in Microsoft Word which tracks all changes live.
In the case of git, once you have everything set up and
configured there is a (simplified) mini-workflow which can be done after
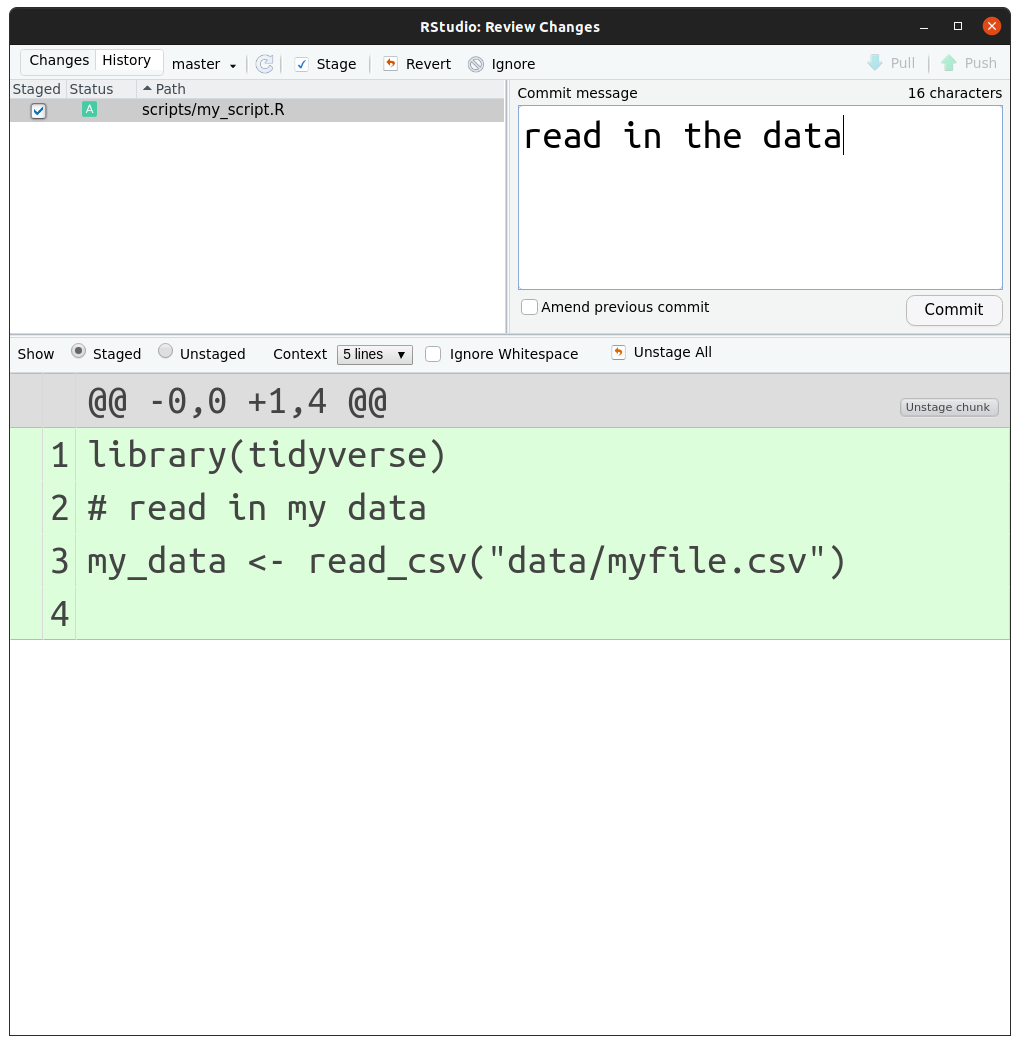
clicking the ‘commit’ button in the git tab:

- Tell
gityou want it to track the changes on a file - Make some changes
- Tell
gityou want to include these changes in its tracking- click the ‘staged’ checkbox on the file in the git-commit window
- Tell
gitto ‘snapshot’ your changes and include a message about them- write a message and click commit in the git - commit window
- go back to step 2.
Why would you do this workflow? For your future self. Every snapshot
you take with git gives you a point in time that you can
roll back to if you wish - from a reproducibility point of view this
lets you run any version of your code at a snapshot.
git can also let you see exactly what changes there were
between snapshots which can be extremely helpful for debugging
git is a fairly complex piece of software and provides
more functionality than this, but for starting out this workflow covers
the main need and use case.
Finalise
Congratulations! You’ve made it to the end-stage of your project where you’re ready to wrap things up and share your project with others. What you do at this stage entirely depends on what output your project was for. Perhaps it’s sending your entire project directory to your lecturer or supervisor. Or this could involve uploading your version controlled code to an online code repository such as https://github.com and publishing the url in your paper or other output.
Regardless, embrace the completion. Then continue on to your next project, bringing with you the skills you learnt on this one.
Appendix
An example workflow set up
# Create and open a new project
usethis::create_project(path = "~/myproject")

# Initialise version control
usethis::use_git()

# Create the project structure
dir.create("data")
dir.create("scripts")
dir.create("output")
dir.create("docs")

# Tell git to ignore the data directory by adding line:
# data/
usethis::edit_git_ignore()


# Add a README
usethis::use_readme_md()

# Add MIT License
usethis::use_mit_license(copyright_holder = "Firstname Lastname")